Accessing and Navigating Unity with Globus
Our lab uses the URI Unity Cluster to store data and analyses. Here’s a breakdown of accessing and navigating through the data with Globus
Please note that in order to access the data stored on Unity, you’ll need to request affiliate access to URI and be added to the lab’s directory. Talk to Joanna for help with these steps!
What is Unity? What is Globus?
URI’s Unity system is their High Performance Computing (HPC) cluster. It’s a network of many computers (“nodes”) working together.
HPC refers to powerful servers or clusters designed for large-scale data analysis — like EEG or ERP processing — that would overwhelm a regular laptop.
Researchers use it to run jobs, store big datasets, and transfer files efficiently.
Each researcher gets a user account and a workspace directory (/work/pi_joanna_morris_uri_edu/…).
When you use Globus, you’re transferring files to and from the storage area of that HPC system.
In sum, Unity is URI’s HPC cluster, and Globus is the web-based tool we use for transferring files to/from Unity’s storage.
General Access
The easiest way to access the data stored on Unity is through Globus as outlined below:
-
Navigate to app.globus.org
-
Select “University of Rhode Island” as your organization from the drop down menu and click Continue
-
Sign in with your Microsoft URI credentials
-
If prompted, authenticate with DUO or one of the other listed options
-
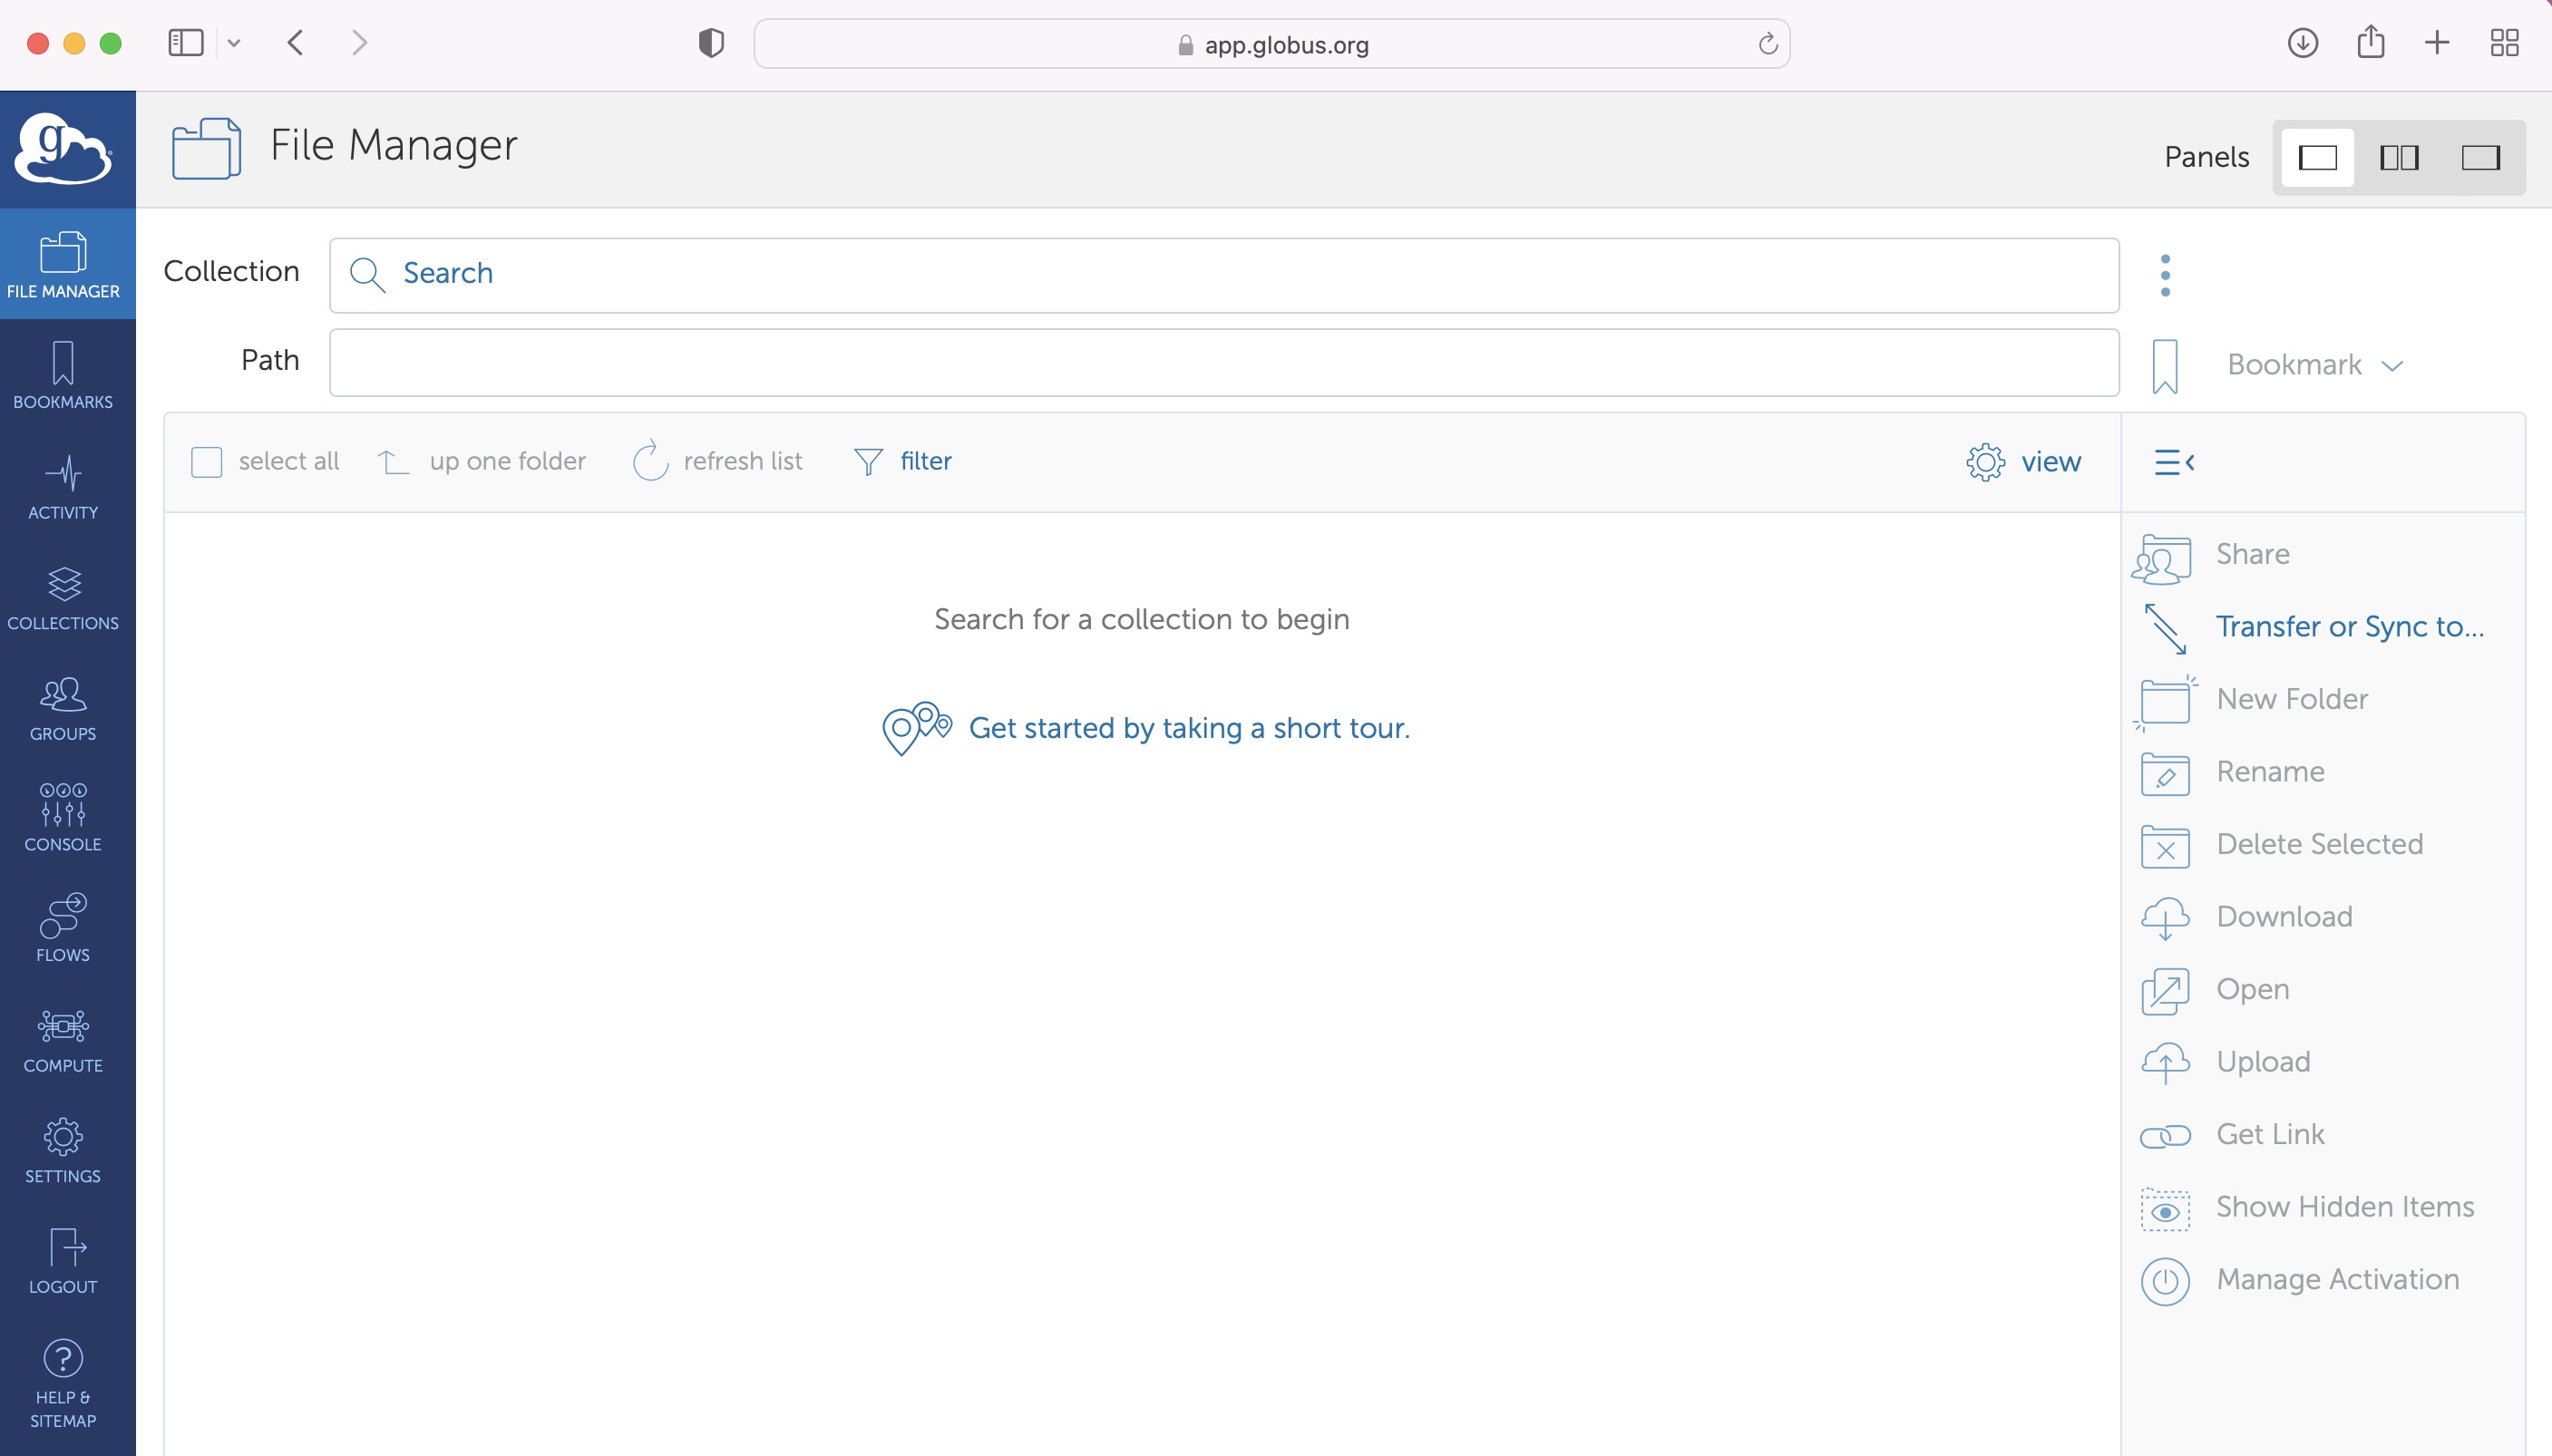
If this is your first time logging in, you’ll be prompted to grant Globus access to your account. You may also be prompted to link accounts. This should be your only Globus account so click your URI email address and continue. Eventually, you should end up on the File Manager page like so:
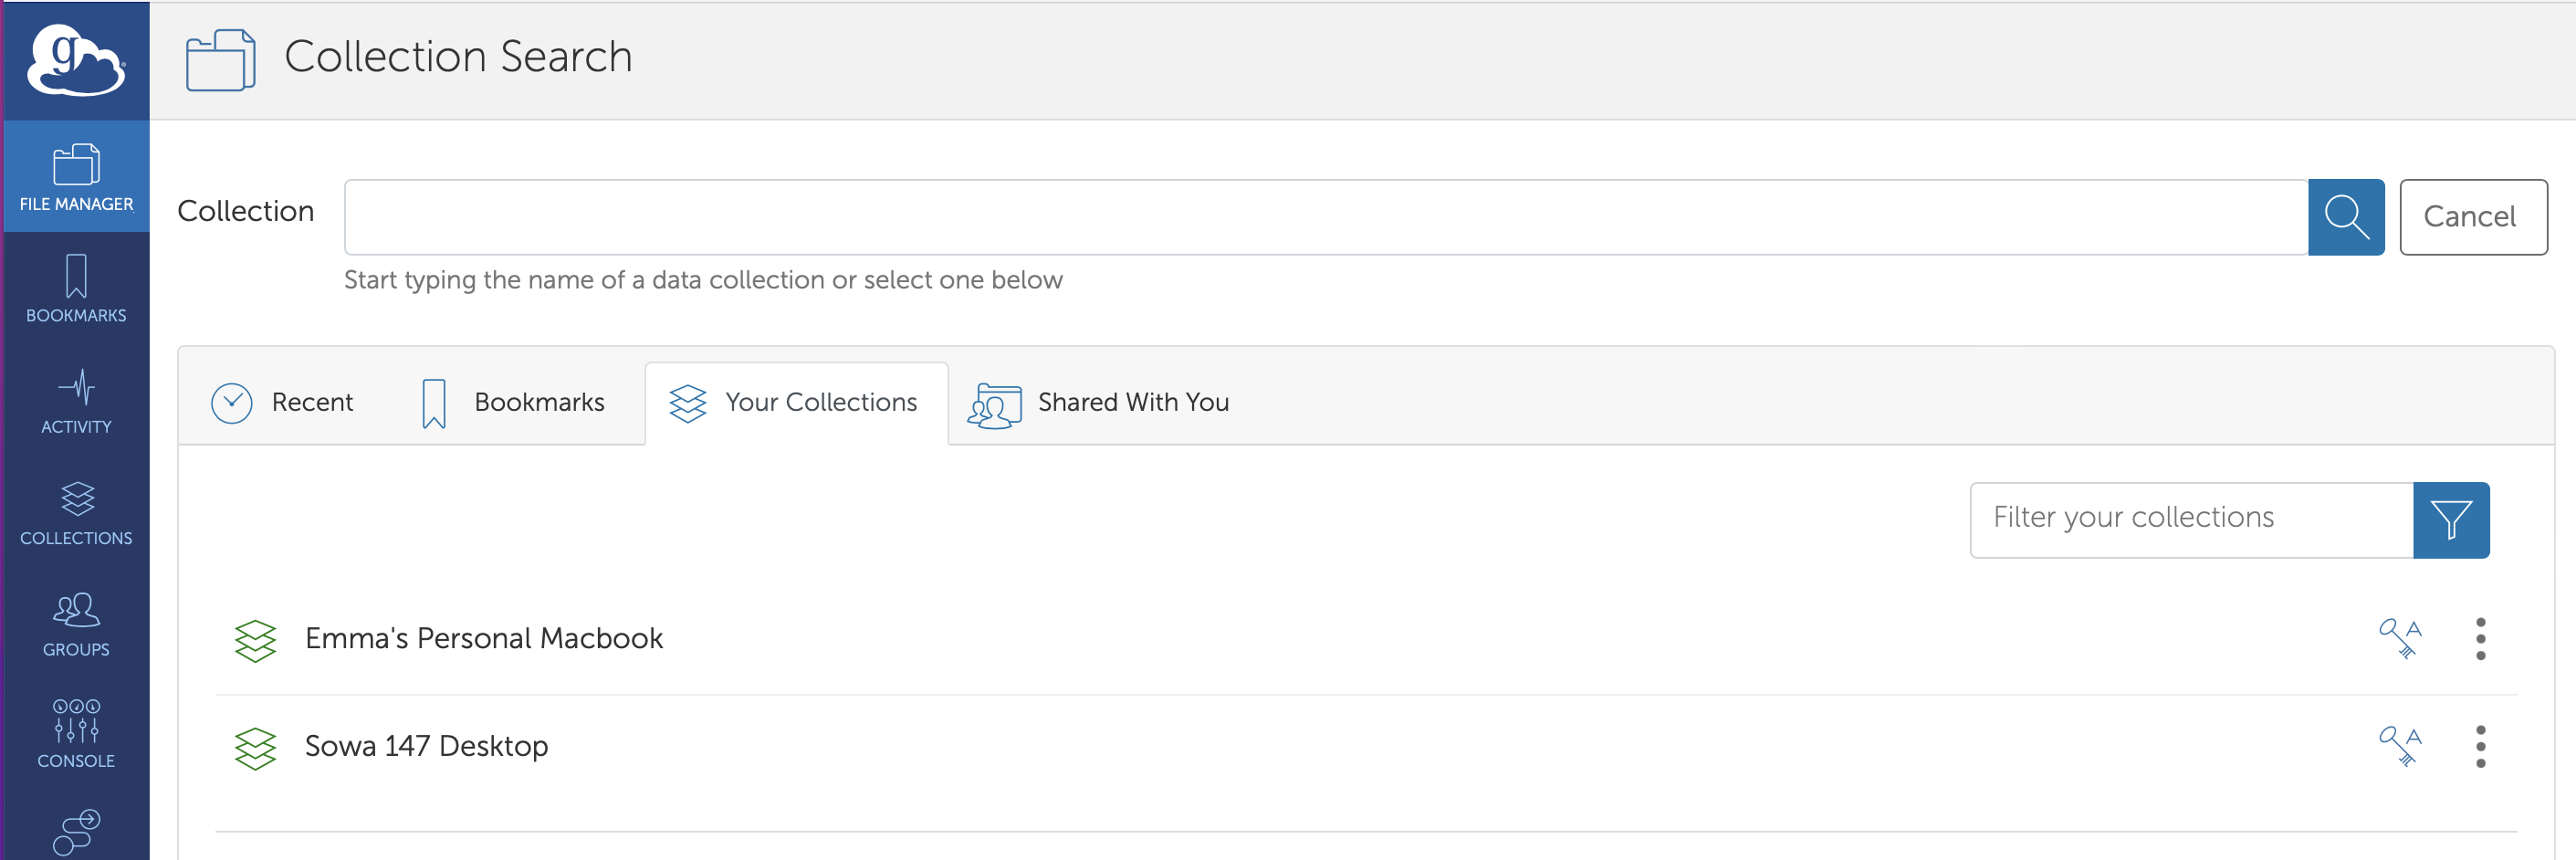
- Search for “Unity” in the Collection search bar along the top of the screen. Click on the first result that appears (Unity Mapped Collection GCS):

-
By default, this will open your personal directory in Unity. The path should be something like “/home/[your URI email address]/”. You can store personal documents here if needed. However, for the most part you’ll want to work in the lab directory.
-
To access the lab directory, change the path to /work/pi_joanna_morris_uri_edu/ :
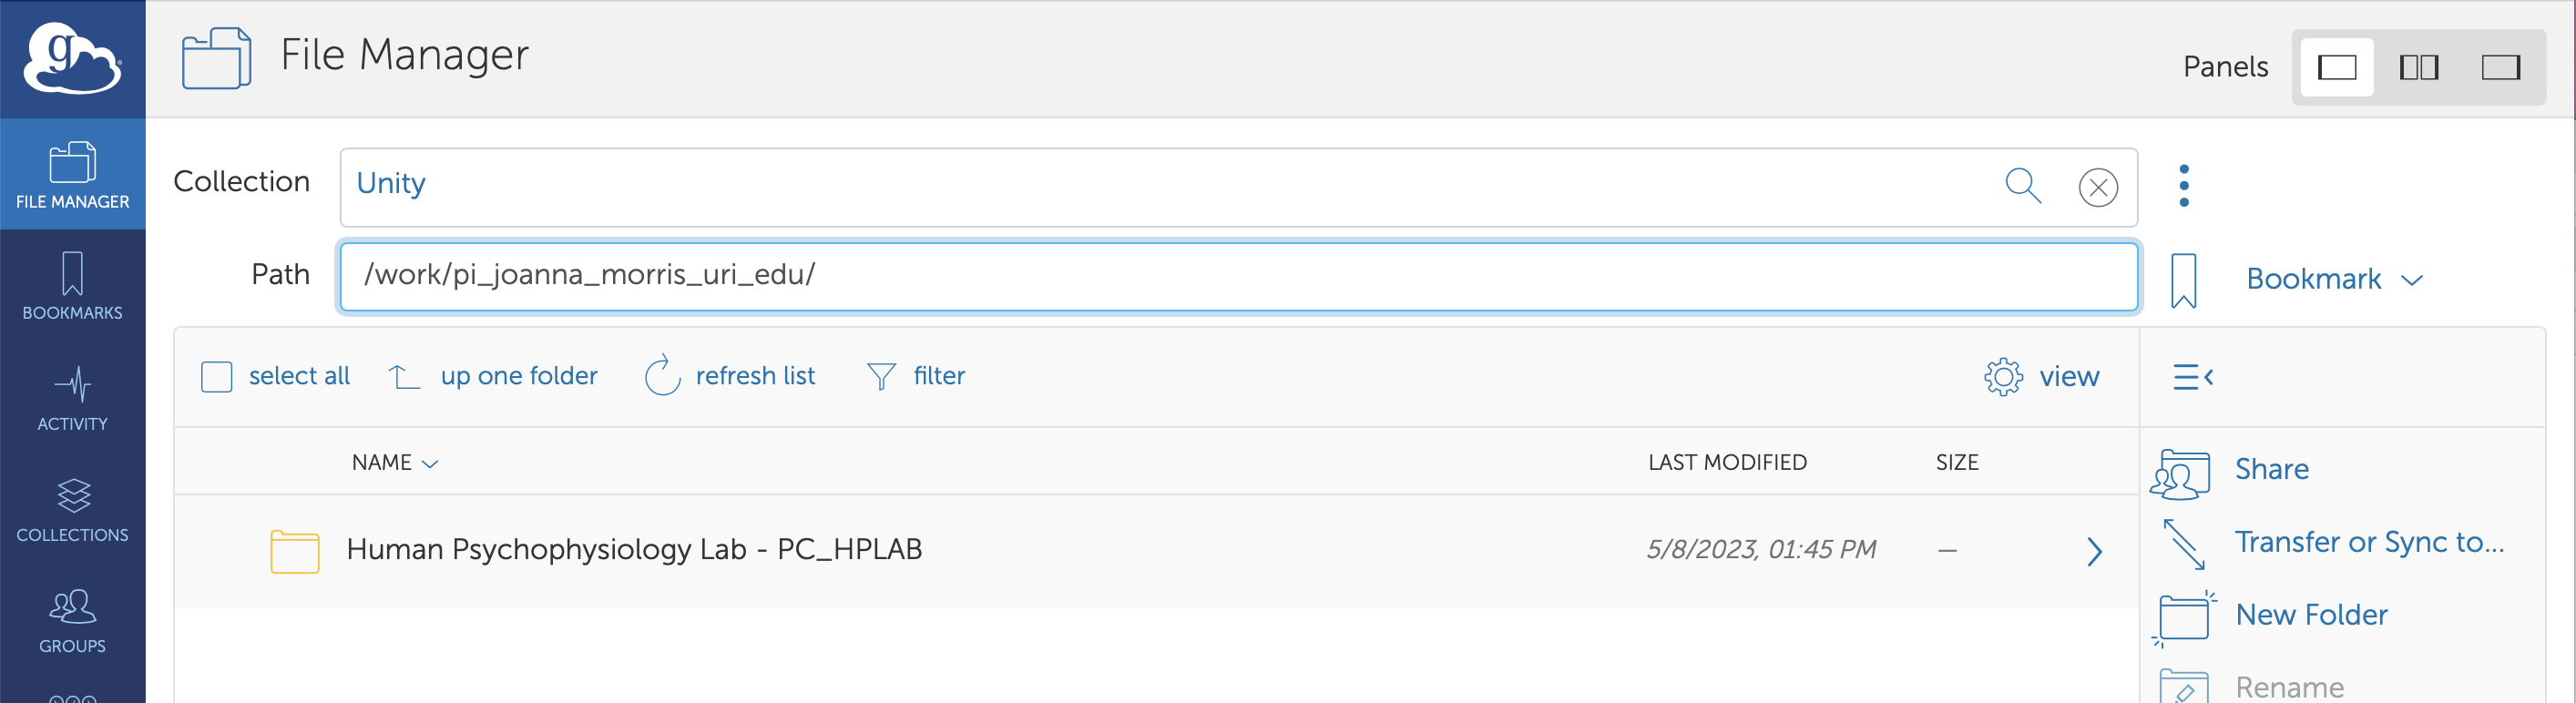
- You can now click on the Human Physiology Lab folder and browse through the lab directory!
Uploading / Download Files
To upload/ download/ sync files to or from your local computer and the lab directory, you’ll need to install Globus Personal Connection. Google “Globus Personal Connection” and download the version for your operating system.
Once you have downloaded Globus Personal Connection, follow the instructions to install the program on your device and set up your local connection to your desktop.
After you have set up GPC, go back to your app.globus.org window and click on the double pane toggle in the top right corner:

In the new panel that opens up, click on the Collections section and navigate to Your Collections. Select your local device from the list:
Your home page should look like so with the lab directory on the left and your personal computer directory on the right:
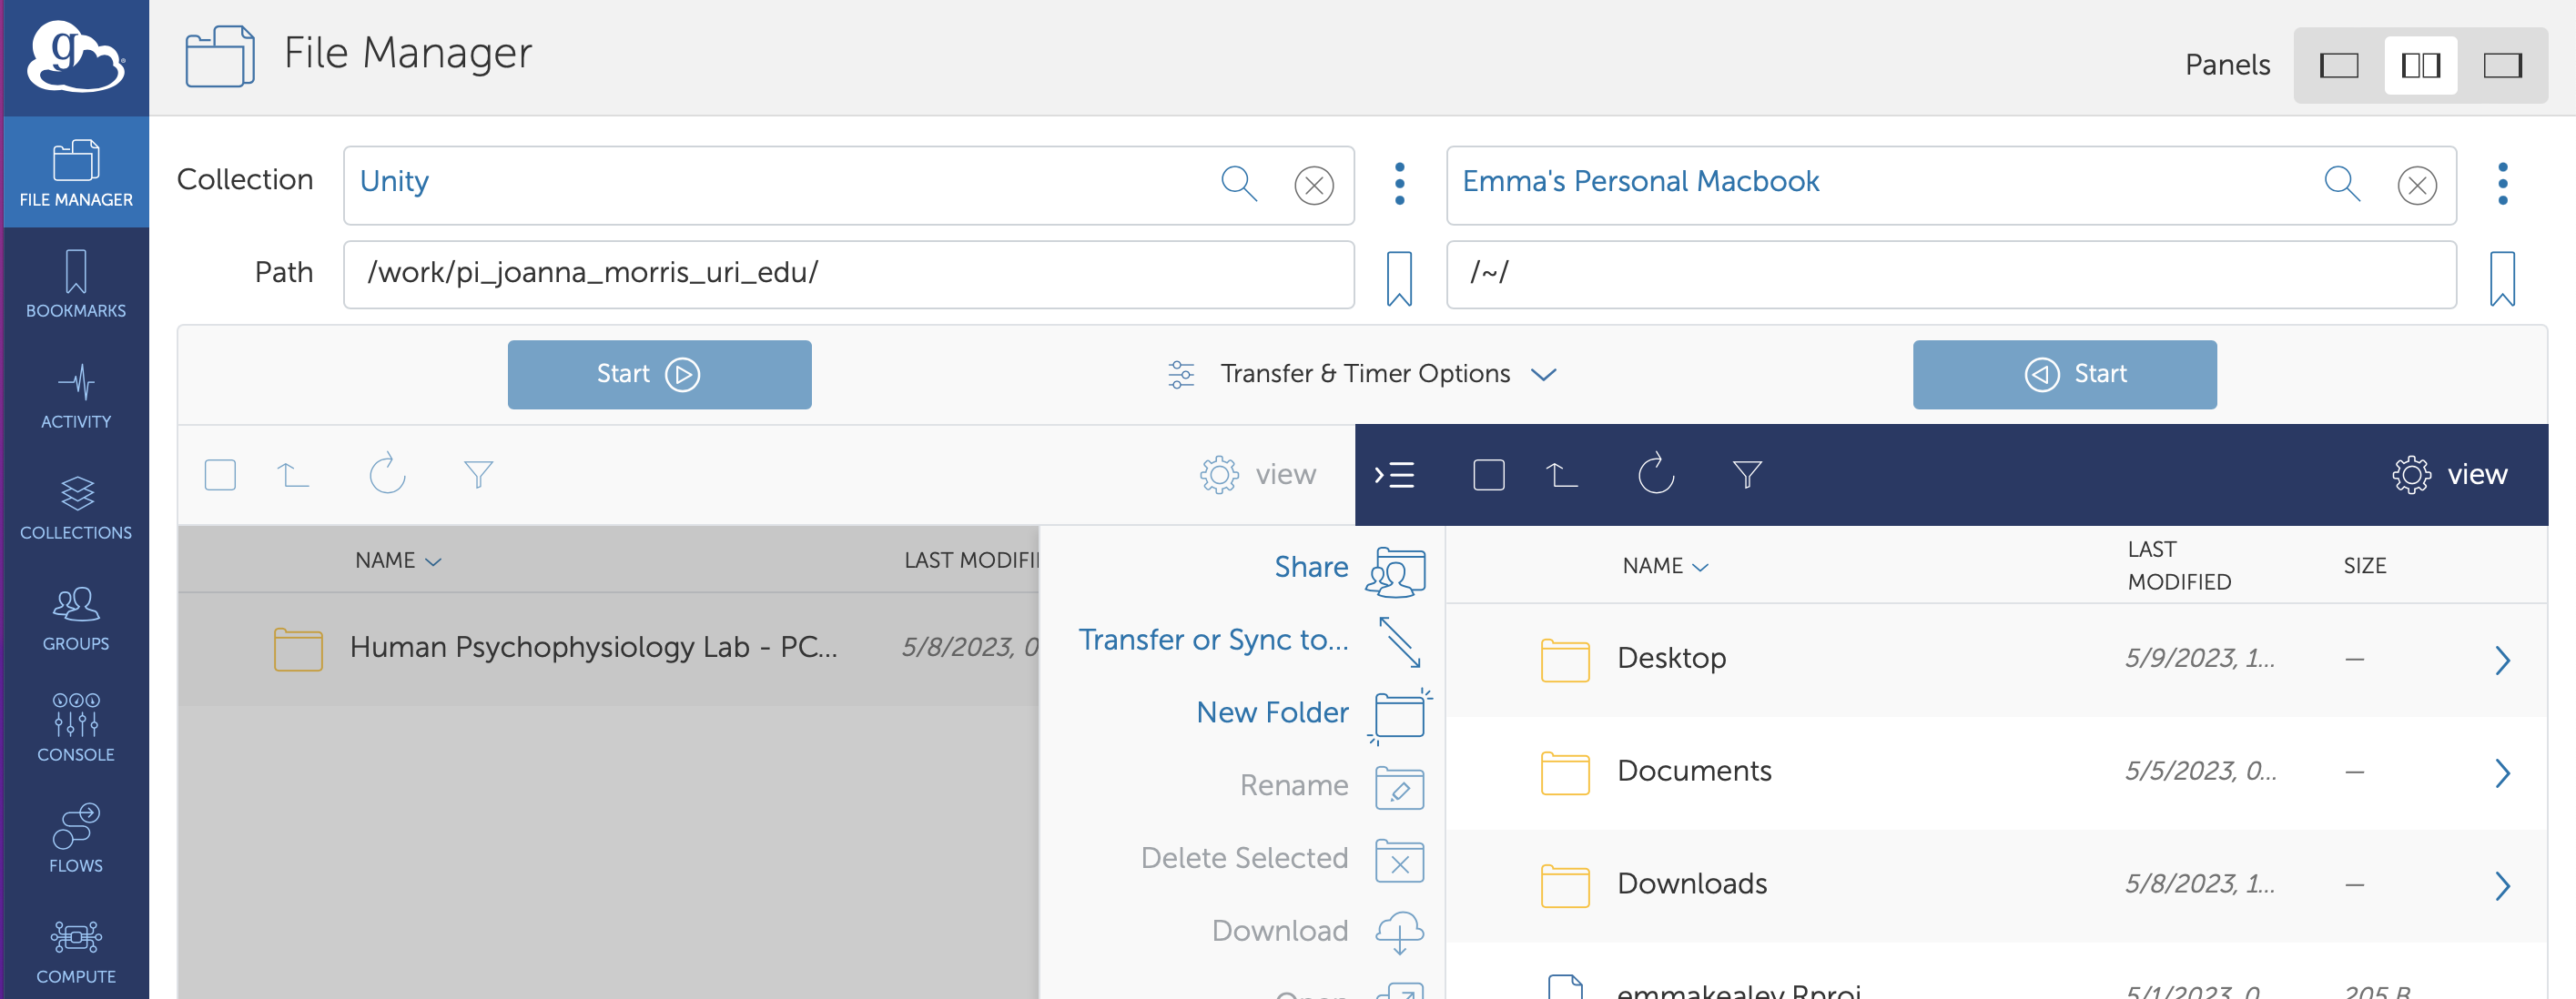
Now that you have both directories loaded, you can start moving files. Start by selecting the files you’d like to upload from your personal directory. Click the checkbox next to each file/folder you’d like to upload:
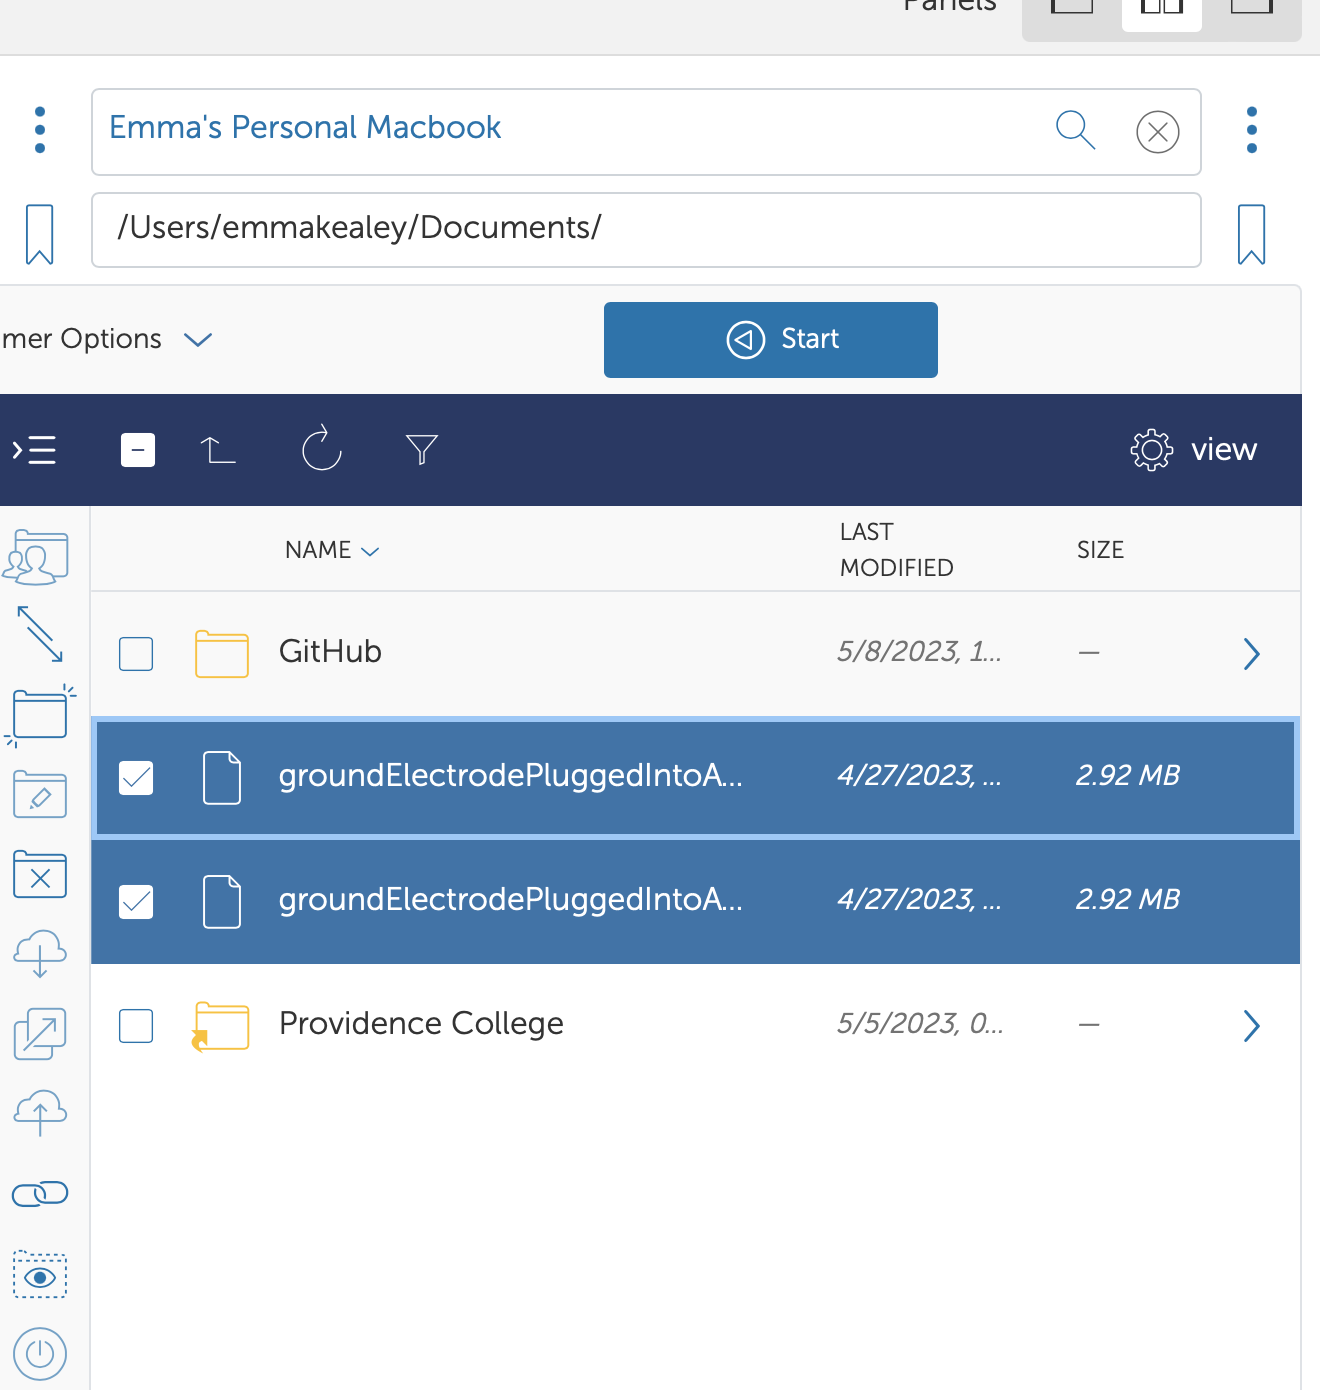
After selecting the correct file(s), switch to the Unity pane and navigate to where you’d like the selected files to live in the Unity Cluster:
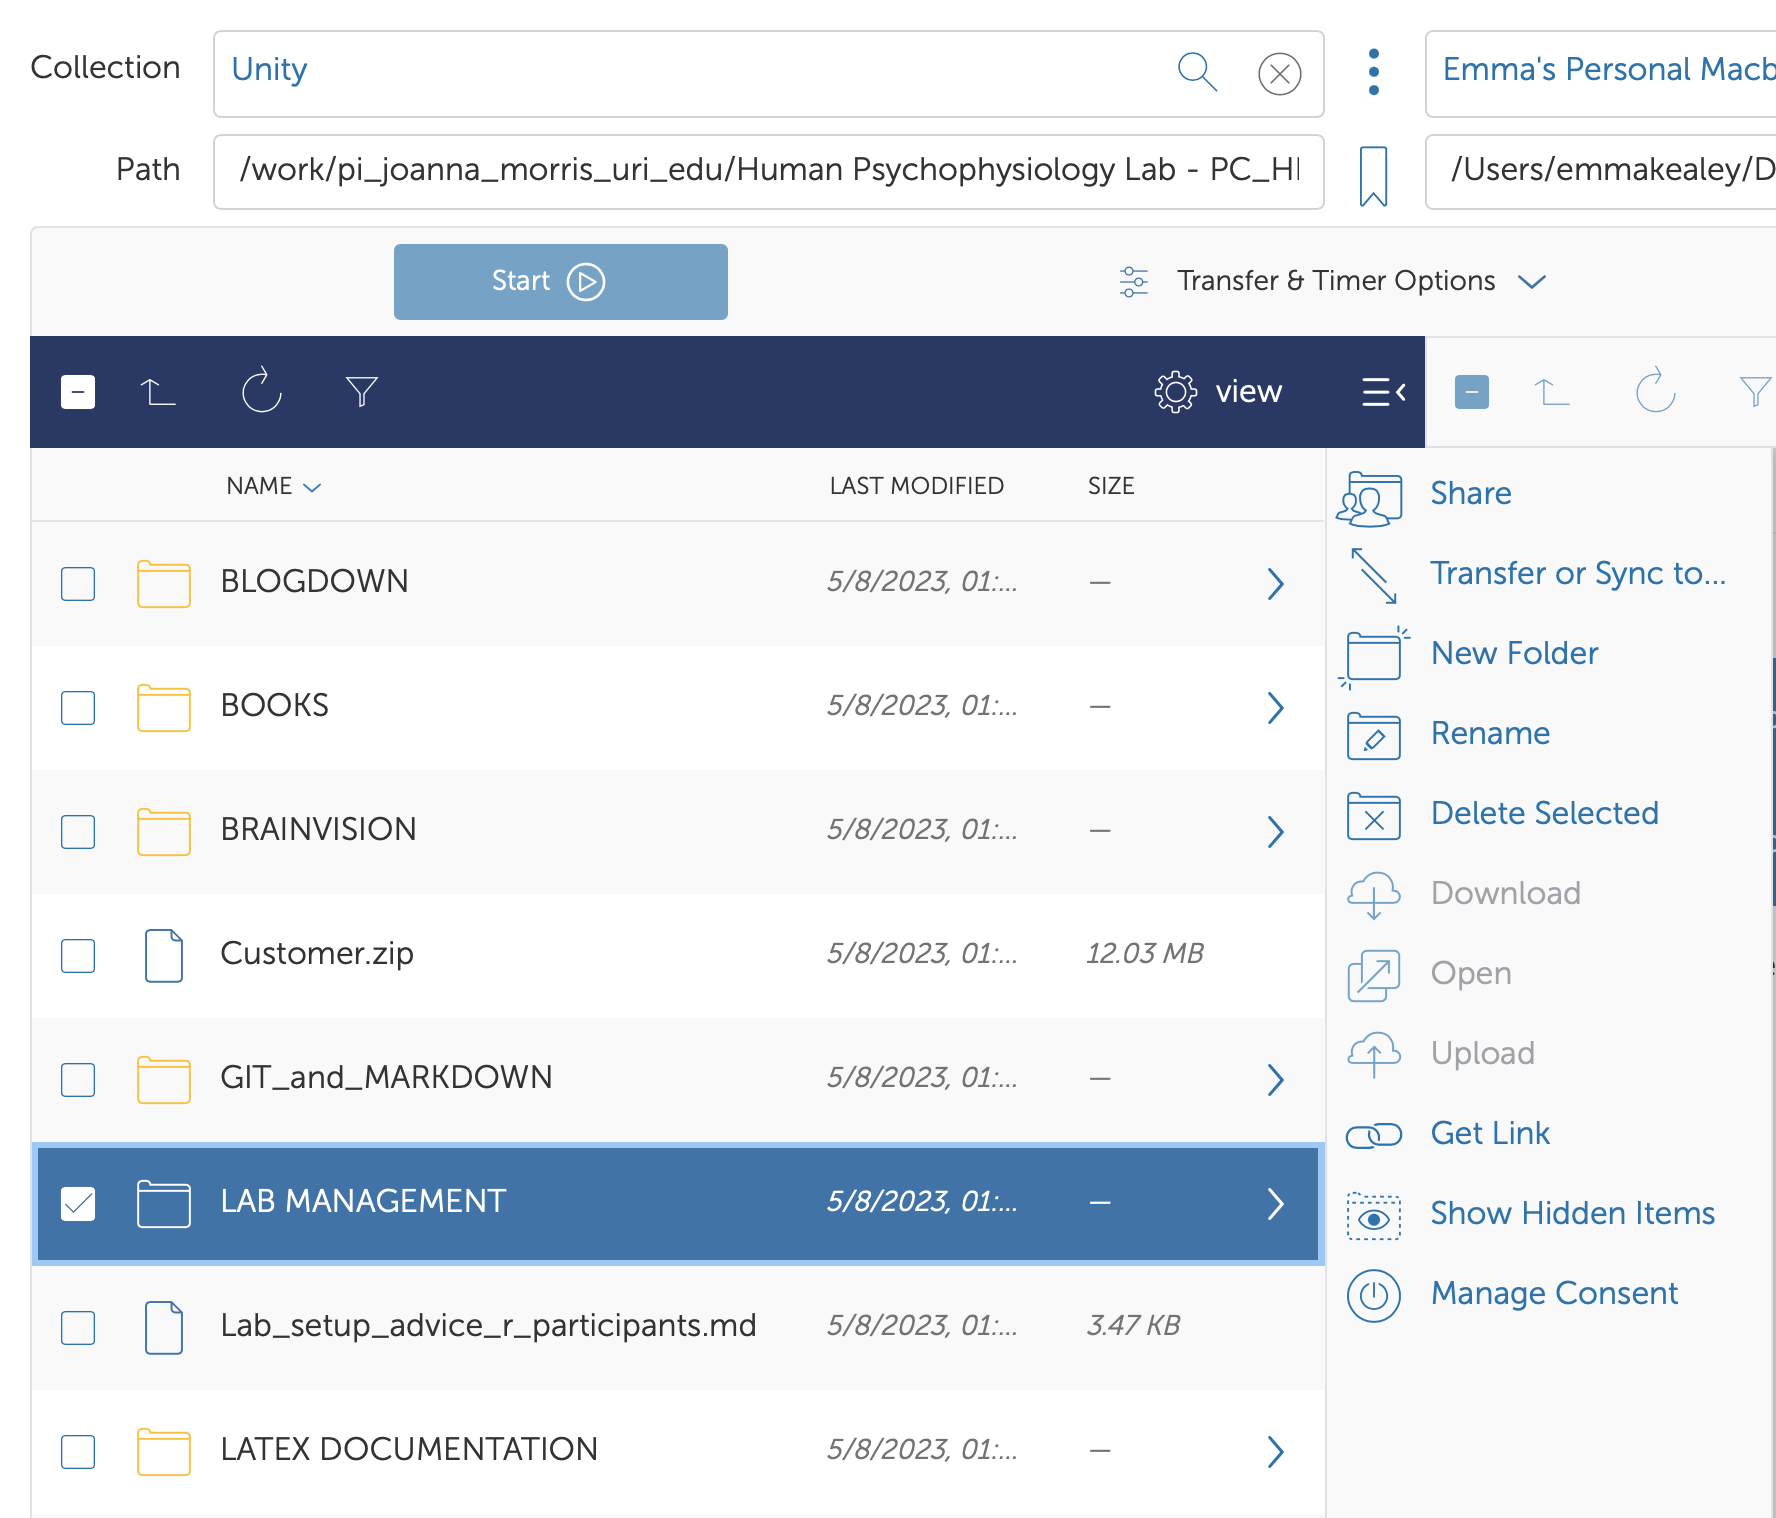
Click Transfer or Sync to… from the middle menu. This should shift focus back to your personal half of the window.
[Optional] click on Transfer & Timer Options to open the modal menu. From this menu, you can adjust how files are synced / transferred, adjust the timing of the transfer, and give your transfer a name:
![]()
Finally, click the blue Start button to start the transfer. You’ll want to press Start fom the side where the files currently live:
![]()
Your job will start and continue on until it completes or errors out. Check out the Activity tab along the left hand menu for more information!
Teams Files
Oh the dreaded Teams files. If you’re trying to upload files that currently live in Microsoft Teams, you may run into some trouble. Here’s what I’ve learned so far:
You’ll want to set up Teams to sync with your desktop automatically. This way, Globus Personal Connection can access the files via your desktop. Check out this article for more information.
Sometime synced files still won’t upload (boo Microsoft). In that case, your best bet is to download the files that are causing trouble and upload them directly from your desktop via Globus. You can check which files are specifically causing trouble by following the steps below:
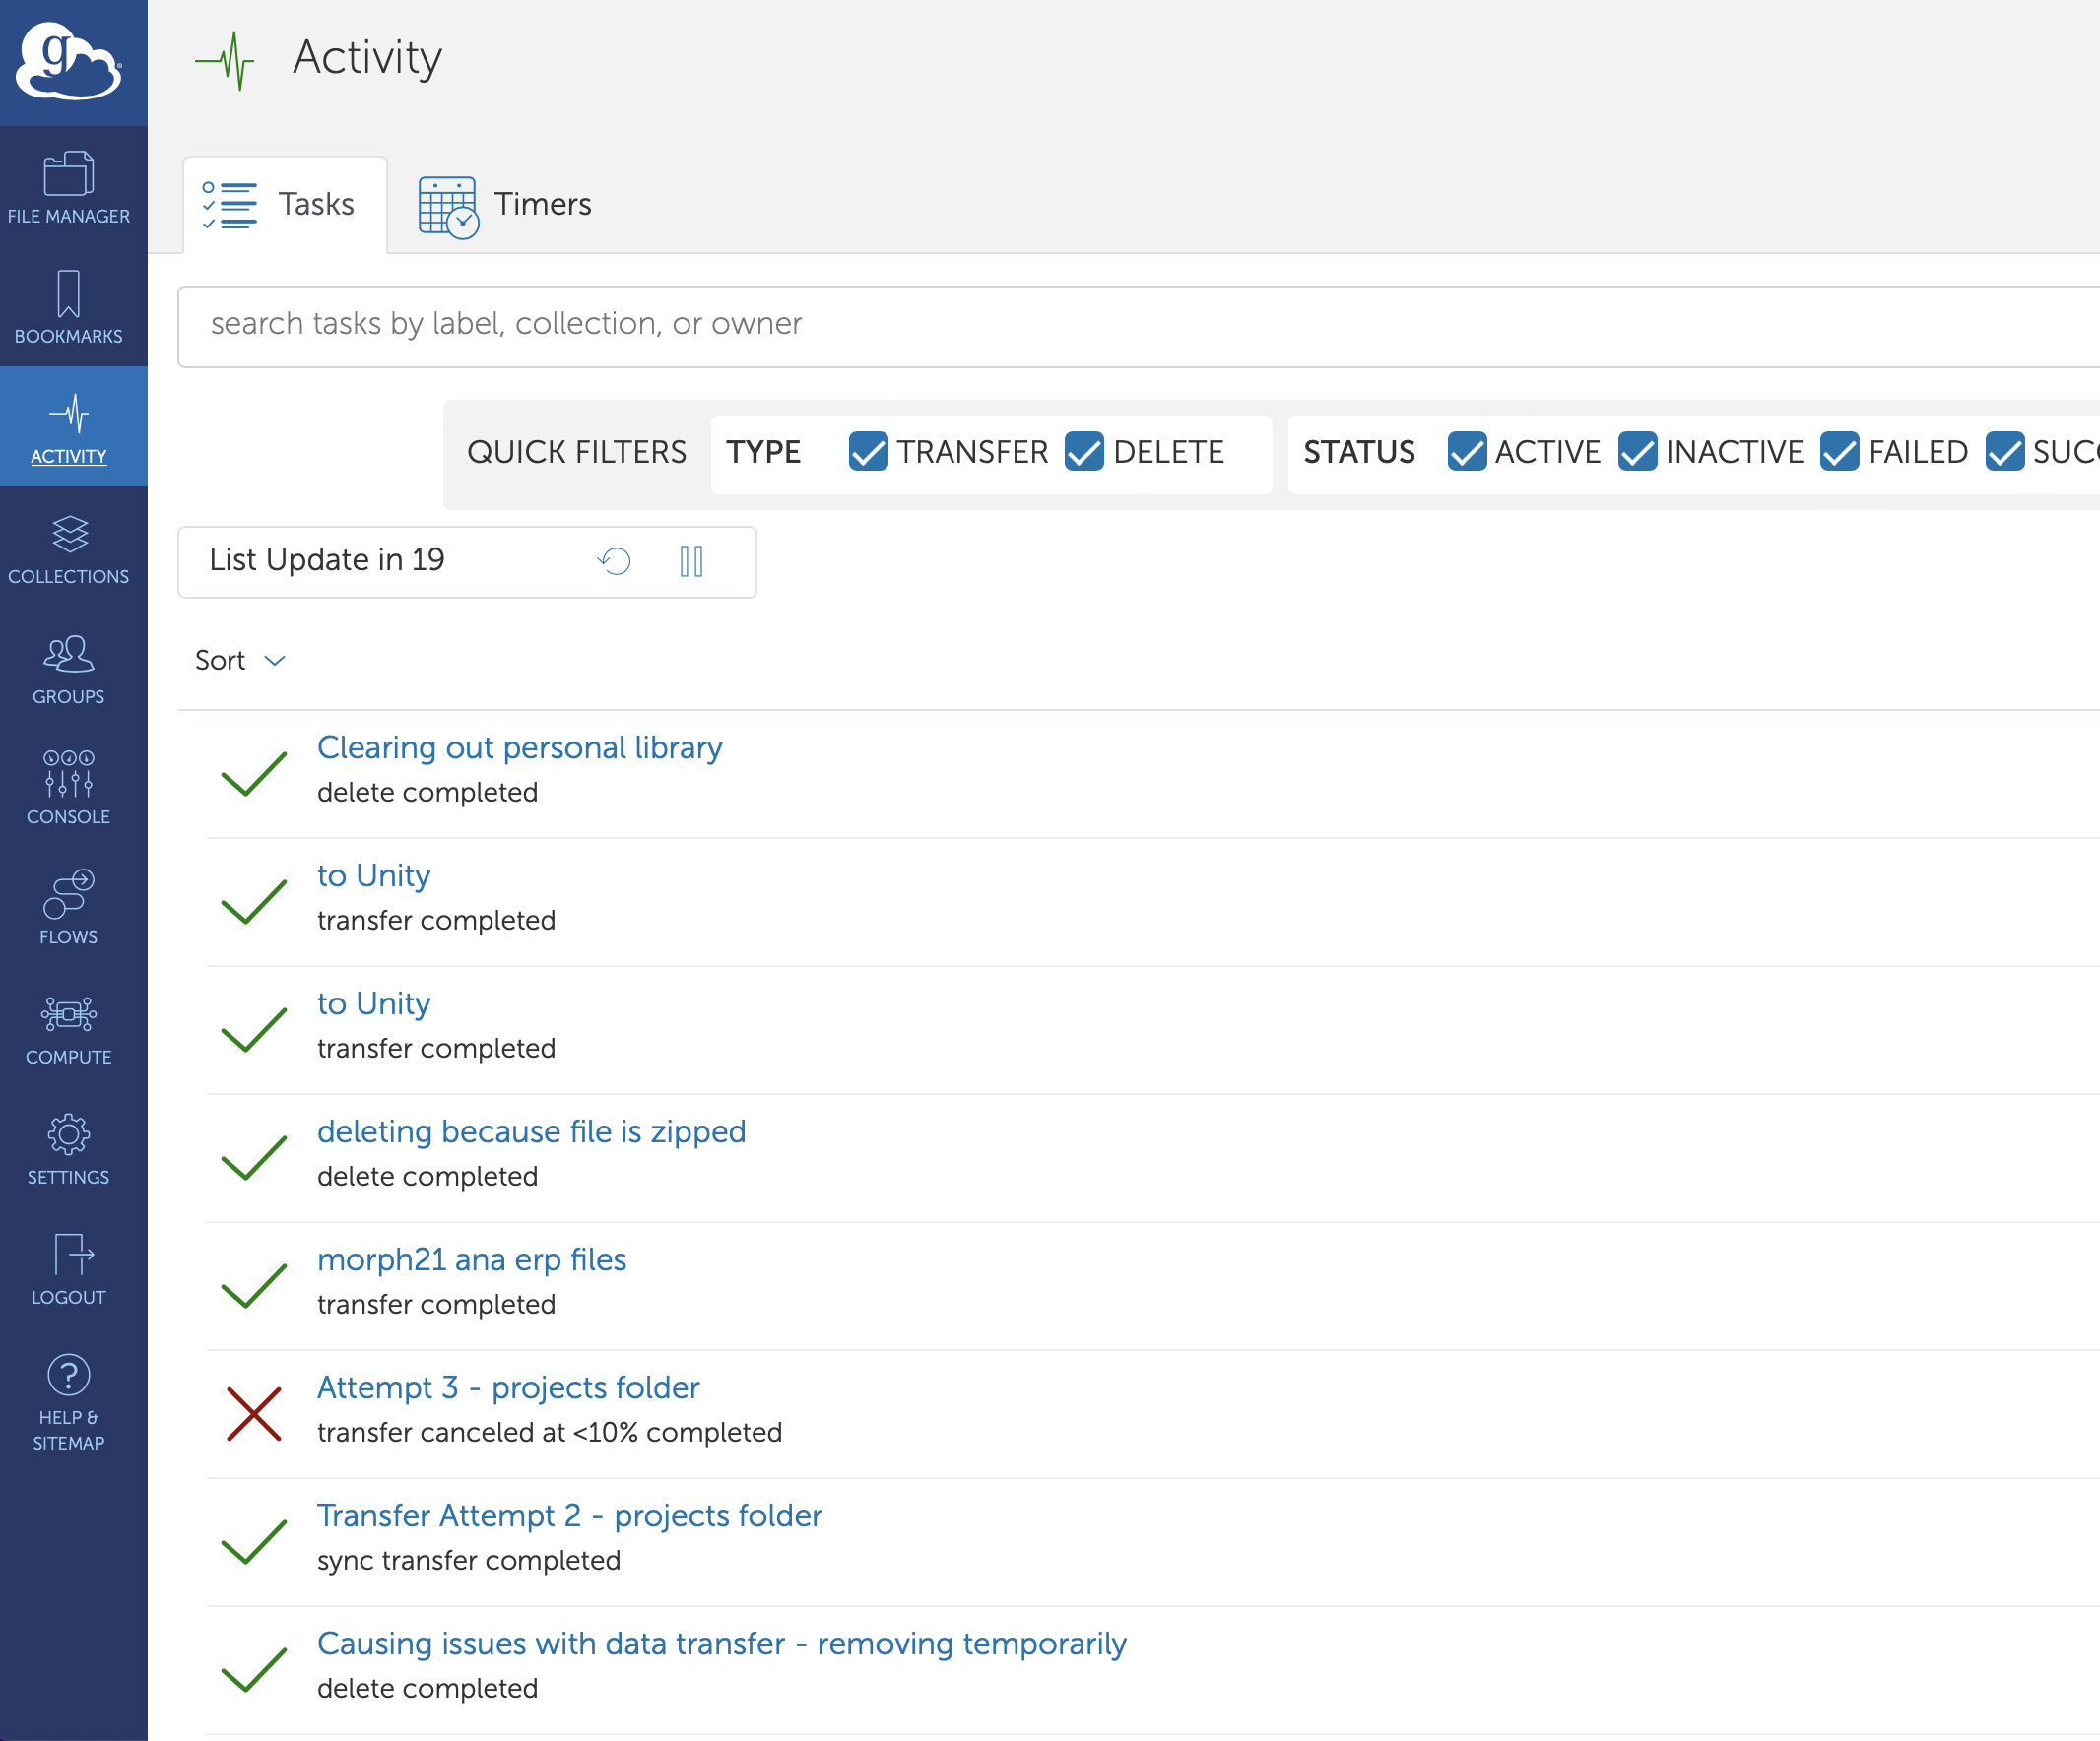
- Go to the Activity tab from the left side Globus Menu:
- Click on one of the errors listed (file not found in the example)
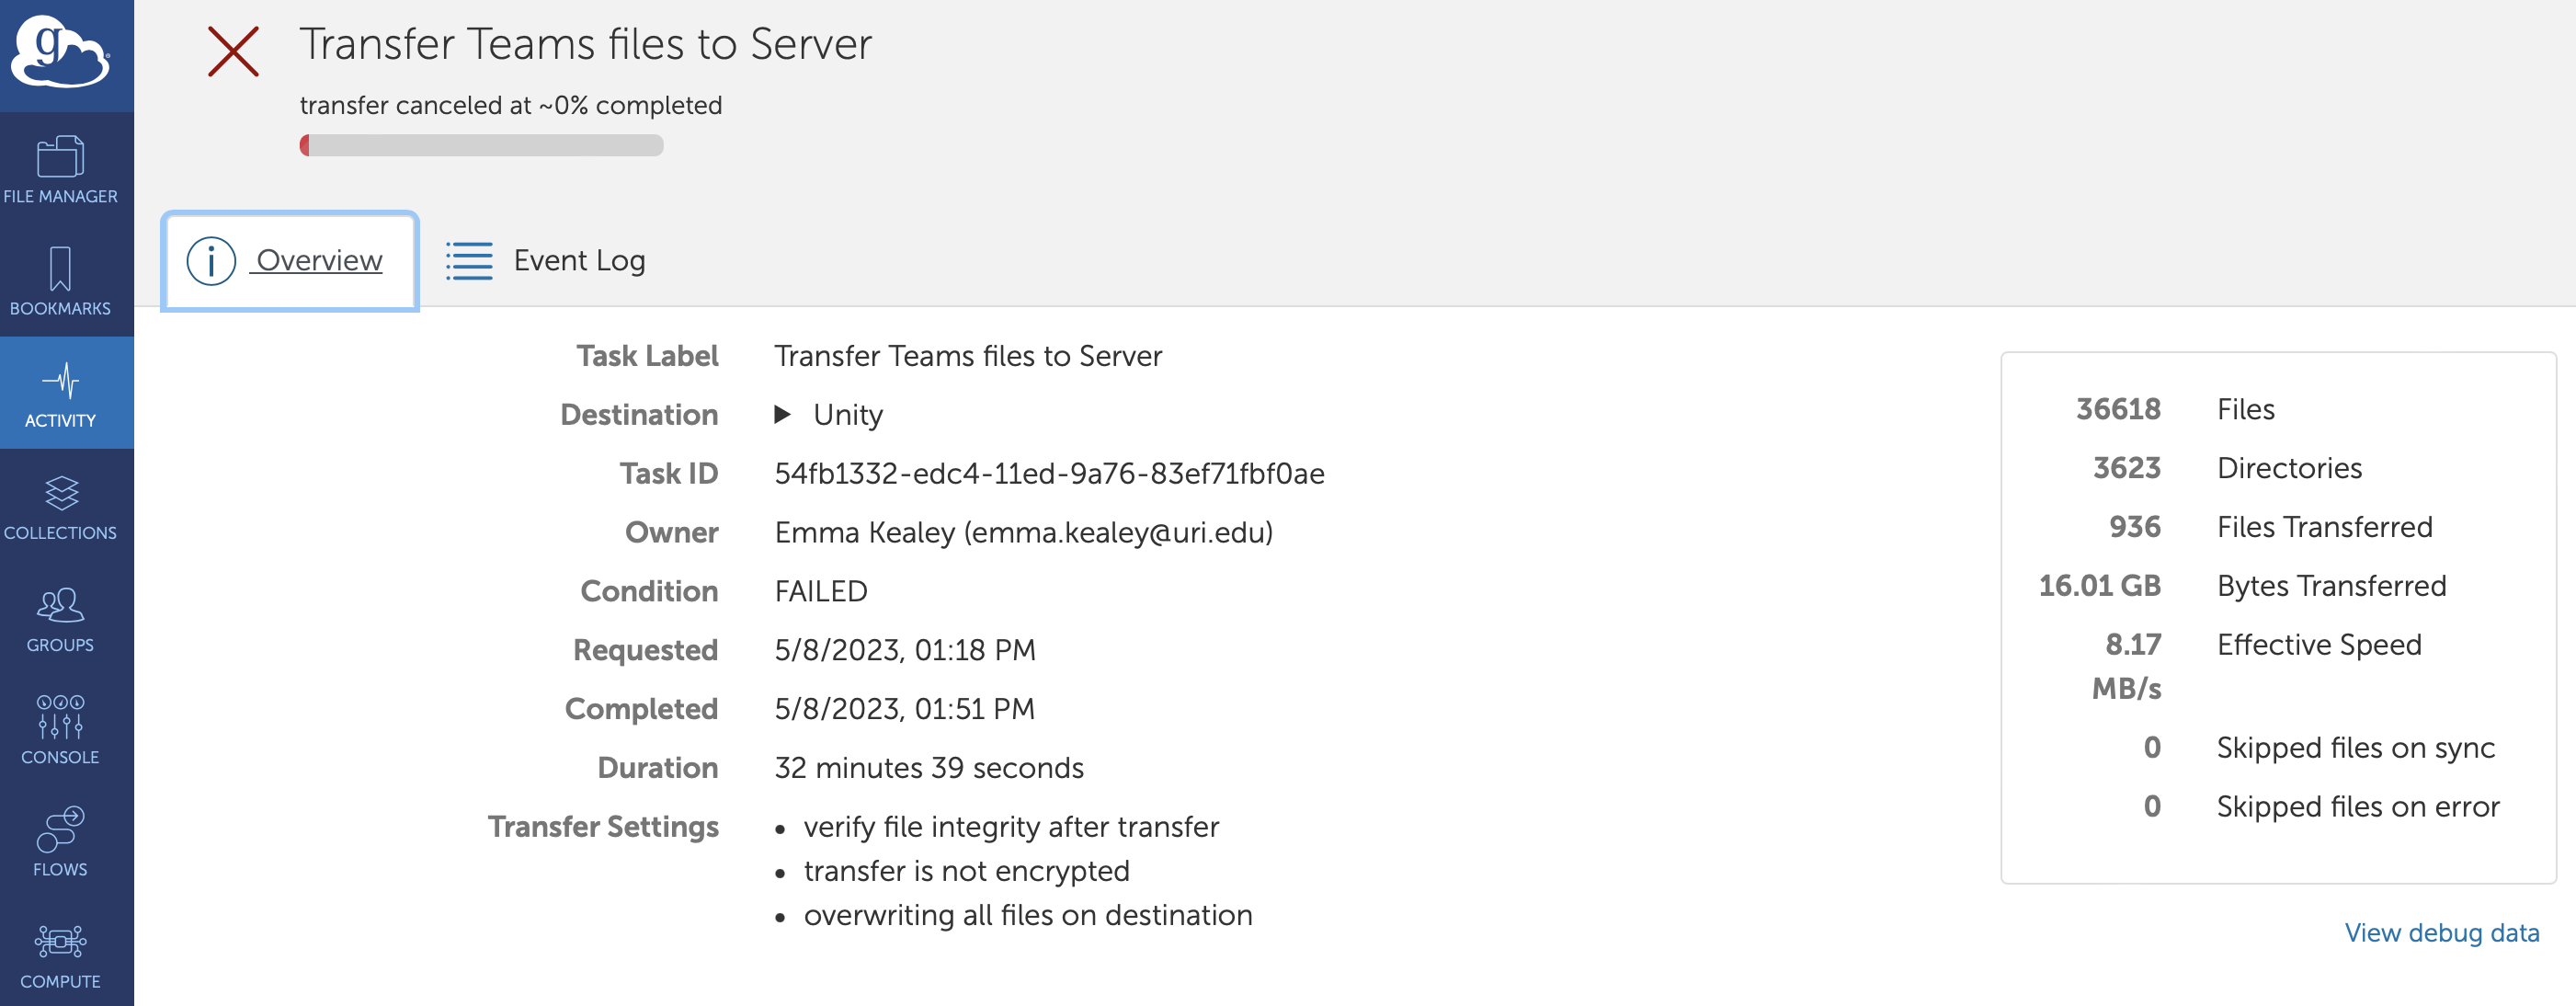
- Open the Event Log
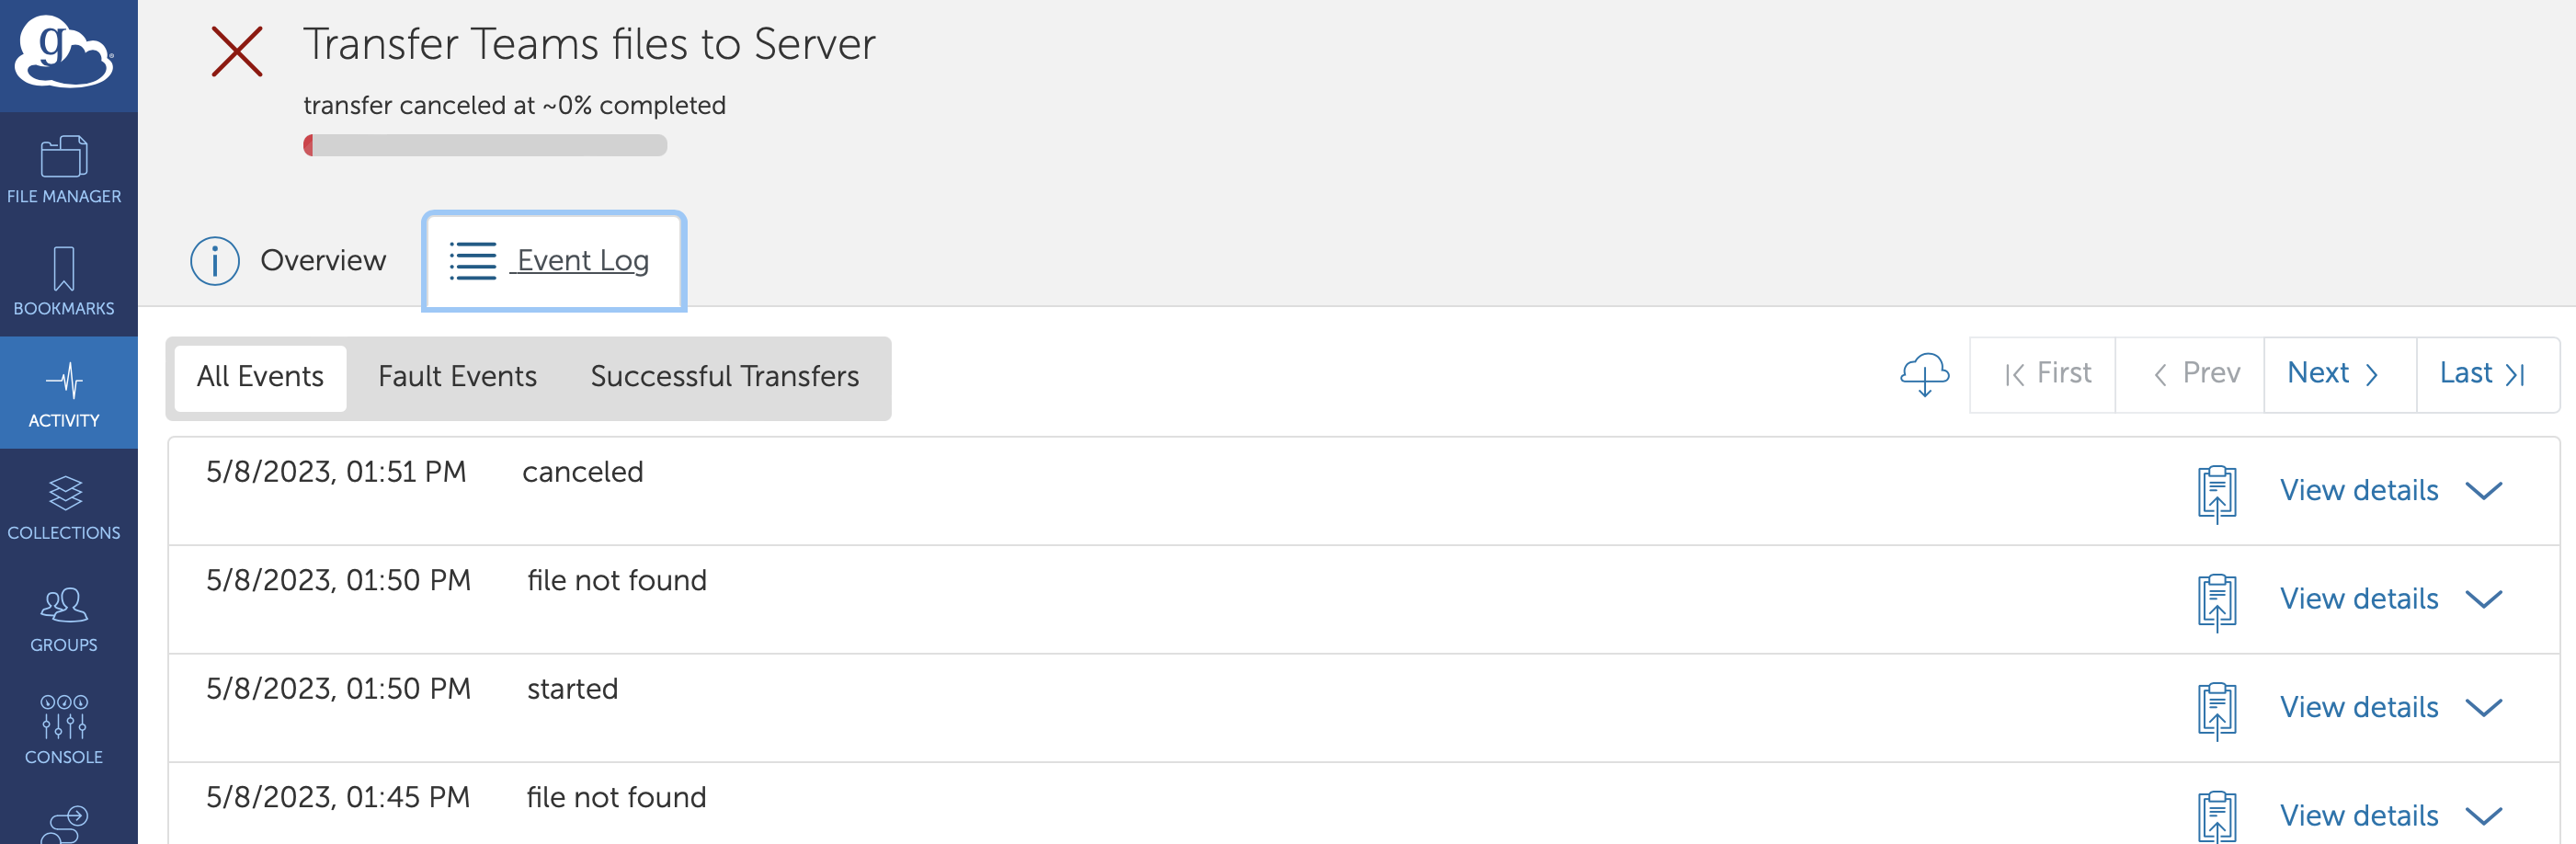
- Click on one of the errors shown in the Event Log. Click View Details and identify the path of the problematic file:
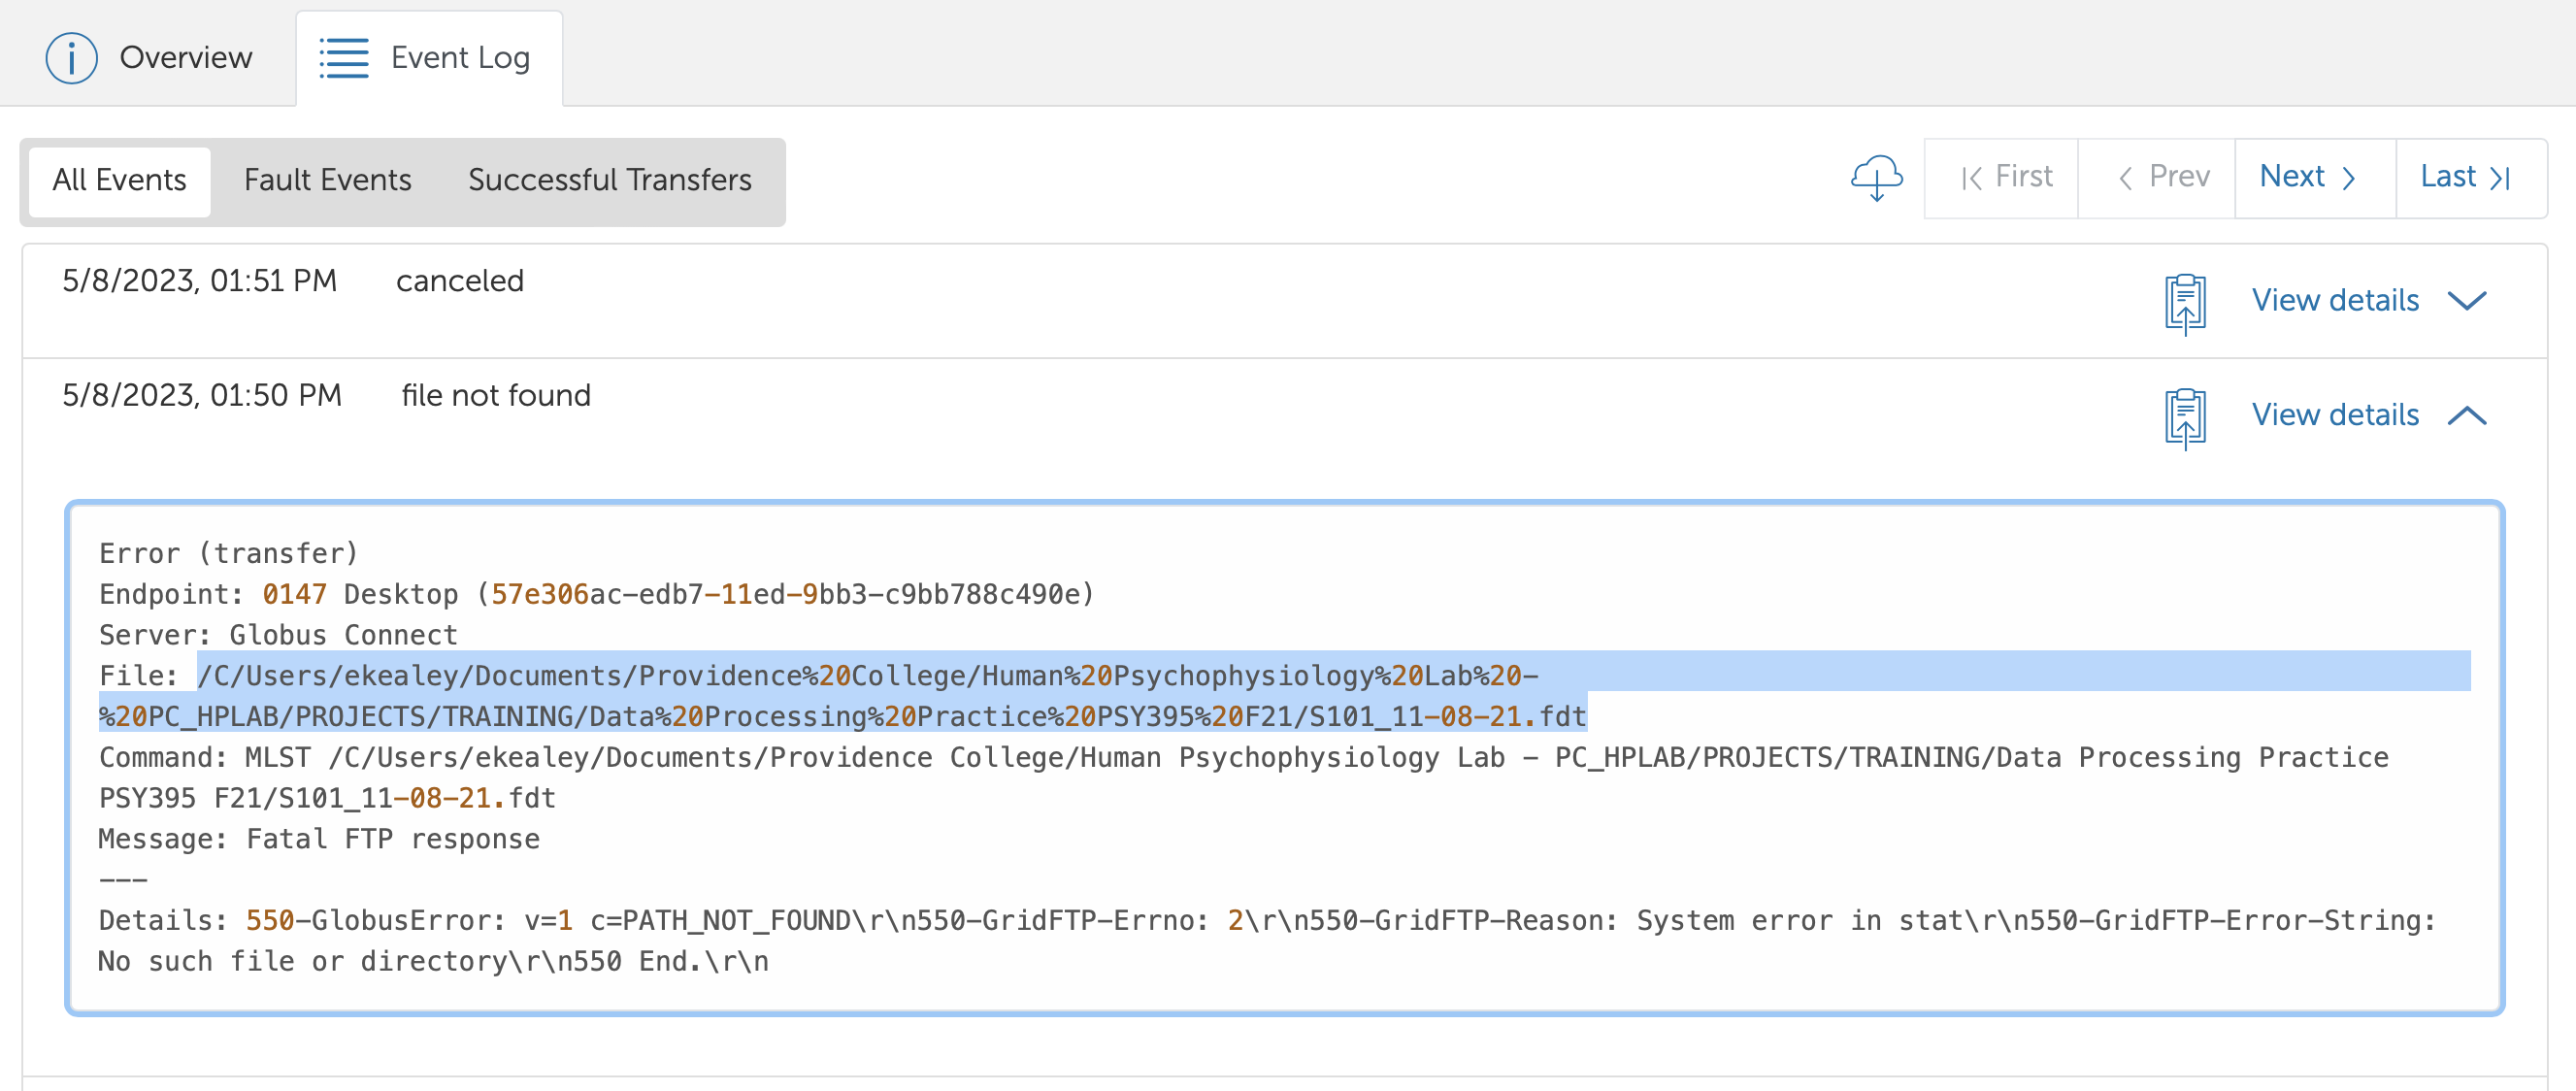
-
Cancel the current Transfer and try reinitiating the transfer without that file.
-
Download the problematic file to your desktop
-
Try reuploading the problematic file from your desktop to Unity via Globus.
SSH
Your Globus access lets you move files if the server’s permissions allow it, but sometimes you may need SSH access to Unity to fix or verify those permissions directly.
SSH stands for Secure SHell and it is a secure way to connect to another computer remotely and type commands there as if you were sitting in front of it. You can think of it like a remote command line; you use it from your own computer’s terminal (e.g.,Terminal on MacOS, PowerShell on Windows). It encrypts everything, so your password and data stay secure while traveling over the internet.
Once connected, you can type commands to: browse files (ls), move around directories (cd), copy files (cp or scp), or run programs and analysis scripts.